Monthly Archives: March 2016

Mountain Survival

If you live in the mountains, you’re probably aware of the unique hazards associated with this environment. You may get something out of this week’s article but it is meant for people that are either city dwellers or live down in the flat. It will be a big help to the people of California that are trying to escape overhiker the mountains before Governor Moonbeam builds his wall. Seriously though, the effects of altitude on the body, environment and weather make mountain survival truly unique.

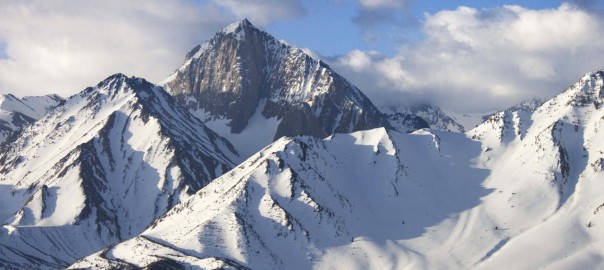
If you find yourself having to cross large mountain ranges, stick to the passes or canyons. Figuring that it would be shorter to go over the mountain, rather than around it may be true for birds but unless you’re in an airplane, it’s not so for humans. They may not look steep from a distance and even as you begin scaling them they may not seem bad, until they are.mountain Nonacclimatized individuals rapidly ascending above 3,000 meters (9800 feet) are at risk of developing high-altitude pulmonary edema (HAPE), a life threatening condition where the air pockets in the lungs fill with liquid.

Many people are afraid of bears or mountain lions or wolves or some such animal, that they are going to be attacked or eaten, but you are far more likely to die from the elements. The mountain will kill you before something that lives on the mountain will.

I will include a quick note about wild animals… For the most part they are more afraid of you than you are of them. There are very few actual man eaters in the mountains.mountain-lion-on-rock_jpg_adapt_945_1 
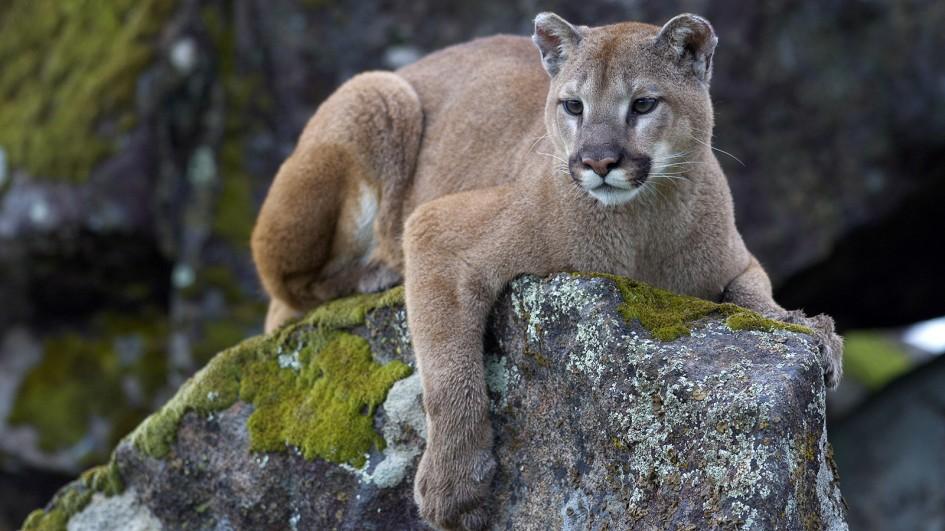
Even grizzly bears and mountain lions would much prefer easier prey than humans. That said there’s no sense tempting fate, so when encountered give them a wide berth, but DO NOT run from them. This same advice should include ANY large animals that have young with them. You seriously don’t want to get between momma and her baby! Your food can attract animals, especially meat, so take care to keep any that you may be carrying in airtight wrapping.

Temperature can be a killer on the mountain. During the spring and fall, the daytime temperature can be, depending on altitude, up in the 70’s or 80’s (Fahrenheit) but at night can still get down below freezing. So it’s very important to layer your clothes! If you’ve been out hiking all day and your clothes are sweaty and wet, and then the temperature drops off fast at night you could find yourself in a hypothermia situation.

Weather at high altitude can change rapidly, due in part to the more powerful and steady winds aloft. Also as water vapor forms clouds and is blown across the mountains, even if it doesn’t become a storm,shelter 
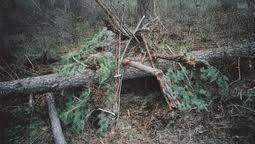
due to the resulting contact with the ground, water condenses on objects making you and your gear wet. As I talk about in The Rule of 3’s, one of the first things you should think about, especially in a mountain environment is protection from the elements. Starting with your clothes, you should have at least 2 ways to stay dry, and a method of building and/or maintaining a shelter.

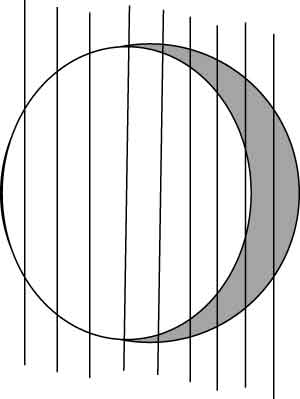
Another concern is the need for water. The air at high altitude is very dry (when there’s no precipitation present) especially in the winter when the moisture in the air is frozen. This leads to… DON’T EAT THE SNOW! Although it satisfies thecreek 
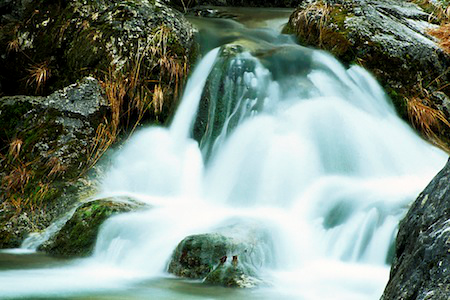
need for water, it erodes the need for shelter; in that it lowers the core body temperature and can lead to hypothermia. There is a long running myth that fast moving water is safe to drink, all ground water found in nature should be treated or filtered before consumption. There is the possibility that you will be okay drinking it, however any bacteria present could result in stomach cramps, diarrhea, even parasites. I don’t think I need to tell you that if you’re running from Governor Moonbeam’s stormtroopers, drinking bad water will really slow you down!


twitterrss

Urban Survival

In the United States, 80.7 percent of the population lives in an urban area, according to the 2010 census which is the latest census data available. Many of us would love to live on our own plot of a thousand acres, off grid and self sufficient or our own private island, but for most of us it’s just not a reality. When life gives you lemons, you can just be sour, or you can look at the bright side, take stock of your resources and make lemonade. If you are like me and although you would truly prefer to live on a mountaintop somewhere, but due to the circumstances you find yourself in, created by the choices you’ve made over your life thus far; your preference has to take a backseat to the realities and responsibilities of the life that you have created. Just because you work and live in an urban area, doesn’t mean you’re any more or less vulnerable than the person that lives on the mountain. highway

In the city you don’t normally have to worry about wolves or bears, but there is the potential of human predators that can cross your path. When living in the city there are two different times of concern: everyday life and life after TEOTWAWKI. Generally speaking in everyday life, minimizing your chance of becoming a victim can be done through situational awareness, attitude, and body language. One thing about living in or near the city; if you want to protect your family and prepare for any emergency, embracing technology is a necessity.

One night last May the wife and I were sitting in an upstairs room of our house that overlooks our driveway, watching a movie. The following morning, my wife got in her car to find out it had been burglarized! They didn’t take a whole lot, just a few CD’s, a box of .380 ammo and her garage door remote.home-security-cameras-480pix I zeroed out all the garage door codes and paired new remotes and installed a day/night vision HD security camera system. Lesson learned, no matter how nice the neighborhood, there is always the potential for theft. Another thing that I am in the process of doing is converting my home to a smart home system, utilizing the z-wave and zigby technologies as well as wifi. I have a hardwired security system but want the added flexibility of a wireless system.

Other basic steps for hardening your home against intruders:

Doors, make sure all your exterior doors are solid core and deadbolts go without saying. Take the screws out of the existing plates in your door jams and replace them with 3 inch screws, do the same with the hinges. The longer screws will go through the door jam and into the double studs inside the wall on each side of the door. If the hinges face outside replace them with hinges that the hinge pins are not removable. Consider installing a separate steel security door in addition to other external doors.

Windows, during normal life there isn’t much you can do except lock them and have window sensors and breaking glass detectors, unless you wantwindowBars to live with bars on your windows. However, you can precut plywood for each of your windows. In the event of a storm or an SHTF event you will have the plywood sheets cut and labeled; use 3-3 ½” hex head lag bolts with washers to bolt them to the studs and plates inside the wall around the window opening.

Security lights and motion sensors are a big deterrent for criminal activity. Turn on the lights floodlightsand the cockroaches run for cover. Inexpensive exterior lights can be purchased with motion sensors attached from most hardware stores.

Monitored security systems and their signs are also a huge deterrent. Actually it’s the signs that scare off the bad guys. Actually the average response time of police to a 911 call in the U.S. is 10 minutes, if they come at all to a house alarm. In cities like Los Angeles or Salt Lake police won’t respond to home alarms unless they have an eye witness like a private security company.

In an SHTF event, more often than not the best course of action is to shelter in place, unless like in the case of a storm or other emergency where burglarcompetent governmental agencies have called for an evacuation. If after such an event, a real and legitimate government has not been reestablished in the area, you may need to defend borders until such time as it has been reestablished. In that case, what you have or more accurately what people think you have can make you a target. In an urban area your greatest threat is the rest of the starving, sick and scared population.

Another thing about an urban area is the plethora of resources in a post TEOTWAWKI event. While there is game to hunt in the country, in the city and surrounding area there are rail yards, steel plants, lumber yards, warehouses, cold storage, dry storage and many other places, even national guard armories in a post apocalyptic world.


twitterrss

Happy St. Paddy’s

Since this week is Saint Patrick’s Day, I thought what better topic than the creation of alcohol for this week’s post. I’ve been making beer for about 4 years and there are hundreds if not thousands of books on the subject not to mention blogs that specialize in it, magazines, news groups, local and national societies, and a lot of competitions. The purpose of this article isn’t to make you a brew-master, but to give you the basic knowledge to brew beer or wine or distill spirits as a means of trade in a post SHTF society. First a disclaimer… the distillation of spirits in the United States is illegal without a license. However, beer and wine can be made without a license for personal consumption. Laws governing beer and wine production vary by state and if interested, you should find out the laws for your specific state.

When making alcoholic beverages, you need to start with a fermentable base. For beer, generally use a barley or barley/wheat base; beerHopsfor wine, a fruit base; mead, use honey and for spirits use vegetables. There are hundreds of recipes available on the internet for free, so it’s beyond the scope of this article to act as a recipe, but more as a blueprint.

When beginning your beer brew, the starch must be removed from the base. If you are using grain it must be malted and cracked. It is then soaked in hot (175-180 degree) water to release the sugar. Use 1 quart of water for each pound of grain, adding the grain to the water will cool it to about 150-155 degrees and that temperature should be maintained for an hour. The water should be collected in your boil pot, the grain should then be sparged or rinsed with 170 degree water to collect any remaining sugar. The previous steps can be forgone if you use a malt extract instead of the all-grain. Boil the resulting liquid for an hour adding hops at different times depending on your recipe. Following the boil, cool the liquid (wort) below 80 degrees as quickly as possible. The wort is susceptible to contamination below 180 degrees so great care must be taken until the yeast has taken hold. homebrew_fermenterThe wort will kill the yeast if it is too hot when it is pitched and should be under 80 degrees when this happens. After pitching the yeast the wort is sealed in an airtight fermenting container that has a one-way vent. As the yeast eats the sugar the byproducts are alcohol and carbon dioxide, if the fermenter isn’t vented it will pop and could explode. It should be stored in a dark cool closet for 2 to 3 weeks while it ferments. Use about 4 ounces of corn sugar in about a cup of boiling water for 5 gallons of beer, combine in a bottling bucket and pour into bottles and cap with oxygen absorbing bottle caps. After 2-3 weeks your beer is ready to drink.

When making wine, you generally use grapes, like with beer you generally use barley. Red wine is made with the pulp and skin of the grape resulting in the red color. White wine is made from the juice from the grape. homemade_wine_press_grandeA stronger strain of yeast is required to withstand the higher alcohol content of wine. It is then fermented for 10 days to a month or more. Fermentation will continue until all the sugar is gone resulting in a dry wine. Many home brewers either use sodium bisulfate to try and stop the fermentation process for a sweeter wine, or let it finish fermenting and then use potassium sorbate and add a sugar solution to sweeten it.

Making liquor or spirits, the fermentation process Is basically the same as beer or wine, what sets it apart is the distilling process. As the mash ferments it becomes a wash at 10-12% ethanol, it is then moved into the pot where it is heated to boiling. The boiling point fdistillor ethanol is 172 degrees while the boiling point for water is 212 degrees. The combined water and alcohol vapor rises into the distillation column, at the top of the distillation column is the lyne arm. The secret to the lyne arm is heat, too much heat and there will be excess water vapor, but not enough heat and there won’t be quality alcohol vapors. The lyne arm is attached to the condensation coil where the alcohol vapor condenses into your distillate and collects in the collecting vessel. The first 5% of the run is called the foreshots or the heads and contains large amounts of volatile chemicals such as ethers and acetone.AgingBarrels-580x385 Next comes the hearts, where the high alcohol content is located, last is the tails that is low in alcohol content and is generally set aside and redistilled later. The hearts are combined with some of the heads, diluted and aged for the final product. Before aging it is colorless and considered moonshine,  however it’s harsh tasting, but aging in a wooden cask will mellow the taste and darken the color.

twitterrss

Bushcraft: Time and Direction

This week we’re going to cover some bushcraft basics. Knowing an approximate time of day or night is a useful ability when hiking, camping or working outdoors. When out in the wilderness you should always have a compass, but if it should become lost or broken, knowing how to find your way is pretty important.

We’ll begin with some global facts. Both the sun and moon rise in the east and set in the west. In the northern hemisphere they track through the southern portion of the sky and in the southern hemisphere the reverse is true. In the mid latitudes of the northern hemisphere during the summer there is approximately 14 hours of daylight and 10 hours of dark;timezone while in the winter there is 10 hours of daylight to 14 hours of dark. The southern hemisphere is exactly the opposite from the northern and around the equator it is basically 12 hours of each all year long extending to the mid-latitudes in the spring and fall. Noon or “high noon” occurs at the high point of the sun tracking through the sky if you live in the center of your time-zone and it isn’t daylight savings time. As an example, in Chicago in the summertime noon would occur 30 minutes prior to the sun reaching its zenith. Add an hour for daylight savings time and subtract 30 minutes because Chicago is on the eastern side of its time zone. Therefore the sun would actually zenith at 12:30 pm.

Knowing when noon is and what part of the year we are in allows us to divide the sky into segments, between 5 and 7 on each side of the zenith depending on the season. So if you have a compass but no watch you can tell the time by the suns position.

If you have a watch but no compass point the hourwatch-as-a-compass1 hand at the sun then put a blade of grass or small twig across the watch halfway between the 12 o’clock position and the hour hand; in the northern hemisphere the half way position is south and the opposite end is north, the opposite is true in the southern hemisphere.

Another useful thing to be able to estimate is the amount of daylight remaining. As the sun begins to get close to the horizon, hold your hand sideways at arms length with the fingers parallel to the horizon, each time-until-sunset-3finger width between the sun and the horizon represents approximately 15 minutes until sunset.

All of the methods above can be duplicated at night with a full moon. It’s when the moon isn’t full that things become a bit complicated. Look at the phase of the moon and divide the circle of the moon by the number of segments of hours in the night. For example in the summer divide by 10 in winter 14, counting from the right side the number of dark segments tells how many hours before sunrise the moon will set in the case of a waning moon. In the case of a waxing moon it tells how many hours after sunset the moon will rise. By knowing what time the moon will rise and set allows us to know when the moon will be at zenith thus directly south in the northern hemisphere. So in the case of the moon graphic,moonPhase on a summer night, the moon is divided into 10 increments, the dark portion is 2 increments therefore the moon will set 2 hours before sunrise. In this case, sunrise corrected for daylight savings time would be approximately 6:00 am and sunset would be 8:00 pm, moonrise would be 2 hours before sunset and moonset would be 2 hours before sunrise, or moonrise at 4:00 pm and moonset at 4 am. Therefore the moon would be at zenith at 10:00 pm, or directly south in the northern hemisphere.

twitterrss

Stockpiling Water

Every day we go about our lives, we get up take our showers, wash our clothes and dishes, every time we turn on a faucet, water comes out. If you’re anything like me there have been times that you turn that faucet and water hasn’t come out. It’s inconvenient and maddening, but what if it was the new normal. If you woke up one morning and the shower didn’t work and neither did the lights. You groan in frustration and pick up your cell phone, the screen is blank and won’t turn on. Whatever the circumstances, the point is that we need on average between 2 and 3 liters of water per day. If you’re not lucky enough to have your own well, where is it going to come from if the water stops flowing? Even discounting the run on the grocery stores to buy every last drop, what happens when that’s gone?

In an emergency situation, you can dig a hole in the ground, put a cup in the bottom and cover the hole with black plastic and put a small pebble or weight on the plastic above the cup and condensation will roll down the plastic and collect in the cup, but that won’t produce 3 liters per day.waterCup

I’m lucky enough to have multiple fresh bodies of water near my home. All I need is a filtering system and I’m golden! Let’s talk about some filtering systems.

There are hundreds if not thousands of commercially available water filtration systems, but over time filters lose their effectiveness and must be replaced or replicated.

The 5 steps of water filtration are:

Screening, Water is passed through a screen which removes large debris. Water pulled from a ground source may not need this step.

Coagulation, alum and other chemicals are added to the water which cause Floc or sticky particles that attract dirt and contaminants, which sink to the bottom of a storage tank.

Sedimentation, water and floc flow into a sedimentation tank where the floc falls to the bottom

Filtration, the water is then passed through gravel, sand and perhaps charcoal.

Disinfection, chlorine or other disinfecting chemical is used to kill micro organisms and keep the water safe to drink. If using ground water this maybe to only step needed.

In a SHTF or emergency situation CPVC marked NSF-61 or NSF-PW has been tested to be safe for drinking water,filter use a piece about 4 inches in diameter and about 4 feet long. Put a rounded cap on one end with a hole drilled in the middle. Put about 2 feet of sand in the bottom and 1 ½ feet of gravel on top of that, leaving about a foot of room on the top to pour water in, and poof instant water filter.

Use 8-16 drops or ¼ teaspoon of chlorine bleach to 1 gallon of water for the disinfection of filtered water, or 2% tincture of iodine at 5 drops per 1 quart of filtered water. In the absence of these chemicals boil water at a full rolling boil for 1 minute.

Here is a great article on drilling your own well.


twitterrss